
✨ This article was AI edited. Editorial responsibility: Hysteroscopy.info.
Produced with AI. This article was artificially generated. Editorial responsibility: Hysteroscopy.info.
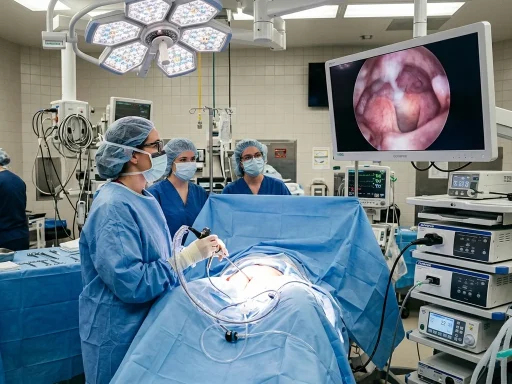
A hysteroscopy is done by introducing an illuminated fiberoptic hysteroscope through the cervical canal into the uterus while instilling isotonic saline to expand the endometrial cavity. High-resolution optical sensors transmit live magnified imagery to a monitor, allowing surgeons to diagnose pathology and deploy micro-instruments in 5 to 30 minutes.
As one of the most transformative advances in modern minimally invasive gynecology, hysteroscopy allows direct visual exploration and surgical treatment of intrauterine disorders without a single abdominal incision. Examining the exact surgical mechanisms, instrument engineering, and clinical methodology reveals why this procedure represents the gold standard for uterine diagnosis and therapy.
Core Surgical Instruments and Equipment
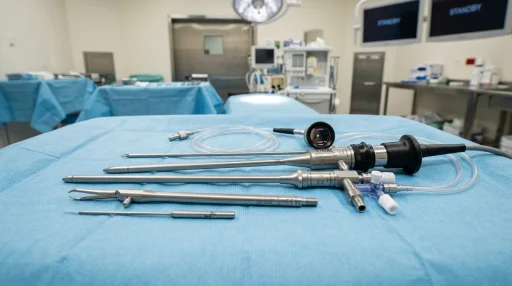
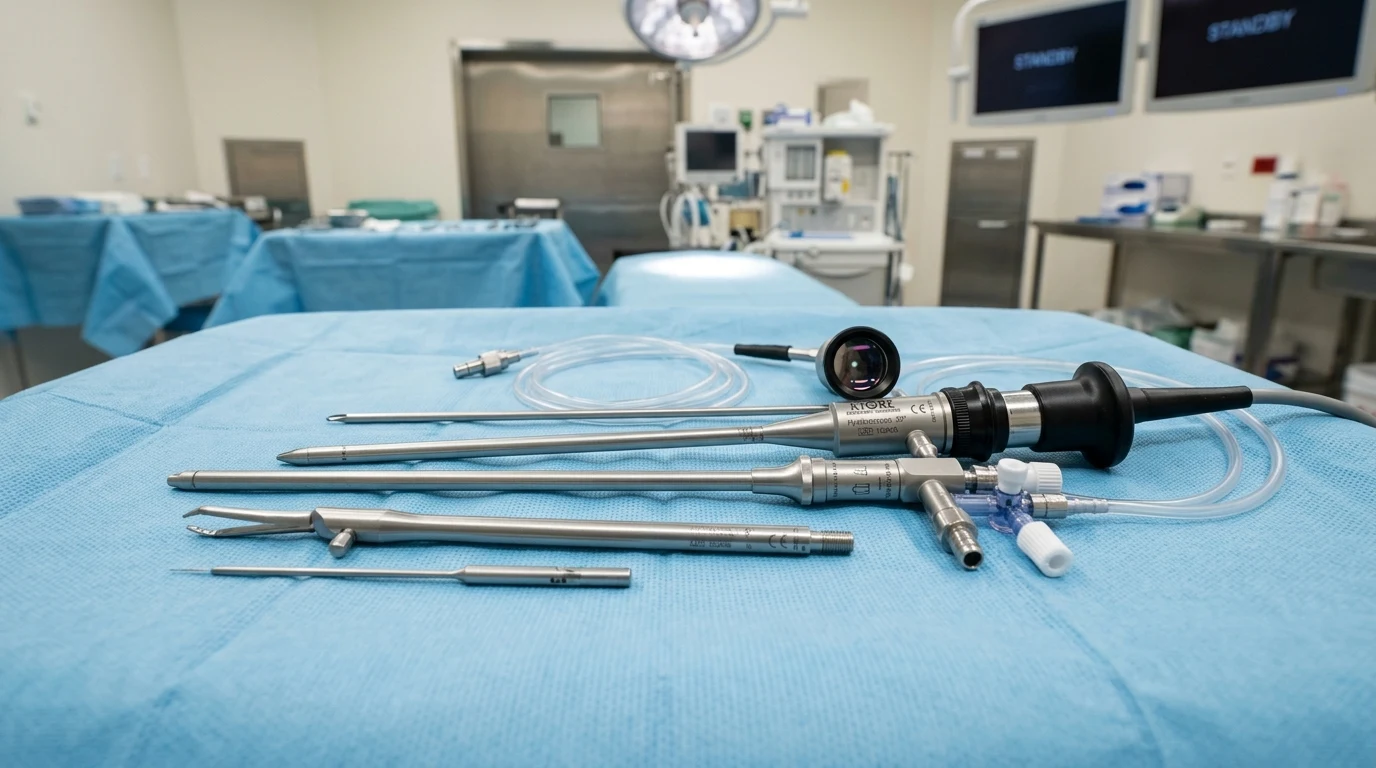
Performing a high-precision hysteroscopy relies on sophisticated optical and fluid engineering components:
| Instrument / Tool | Dimensions & Technical Features | Clinical Purpose in Surgery |
|---|---|---|
| Rod-Lens Hysteroscope | 2.9mm – 4.0mm diameter; 0°, 12°, or 30° field of view | Delivers crystalline optical visualization through the narrow endocervical canal into the fundus. |
| Continuous-Flow Outer Sheath | Dual-lumen stainless steel sheath with stopcocks | Channels continuous fluid inflow and evacuation, preventing clouding from blood or mucus. |
| Electronic Fluid Distension Pump | Pressure-sensing peristaltic pump with scale integration | Maintains stable intrauterine distension pressure (70–100 mmHg) while logging fluid deficit. |
| High-Definition Video Camera & Light Source | 300W Xenon / LED cold light with 4K UHD sensor | Transfers high-intensity illumination without conducting heat into delicate reproductive tissues. |
| Micro-Operative Instruments | 5-French flexible/semi-rigid graspers, scissors, electrodes | Pass through the working channel for targeted biopsy, polypectomy, or adhesiolysis. |
Detailed Procedural Steps: From Entry to Conclusion
Every hysteroscopic procedure adheres to a rigorous surgical protocol designed to maximize diagnostic yield while protecting the myometrium:
1. Sterile Setup and Cervical Orientation
The patient is positioned in standard lithotomy. Following antiseptic preparation, the clinician evaluates uterine position (anteverted vs. retroverted) to determine the natural insertion axis.
2. The Vaginoscopic Entry Technique (Bettochi Approach)
Rather than using rigid metal speculums, the clinician introduces the continuous-flow hysteroscope directly into the vaginal introitus. Fluid distension opens the vaginal walls, allowing the scope tip to locate the external cervical os under direct vision. This no-touch approach minimizes patient discomfort and vagal stimulation.
3. Traversing the Endocervical Canal
The scope negotiates the endocervical canal under continuous hydrodynamic pressure. The saline gently parts the endocervical folds, guiding the lens smoothly past the internal cervical os into the central cavity.
4. Systematic Endometrial Cavity Survey
Upon entering the main uterine cavity, the surgeon performs a standardized anatomical assessment:
- Uterine Fundus and Cornua: Inspecting the top contour for congenital septa, subseptate arches, or focal lesions.
- Tubal Ostia: Visualizing the entry points of both right and left fallopian tubes to verify cavity symmetry.
- Anterior and Posterior Endometrial Walls: Evaluating vascular architecture, glandular openings, polypoid growths, or submucosal fibroid protrusions.
5. Therapeutic Micro-Interventions
If abnormal structures are encountered, surgical tools are deployed through the instrument channel:
- Micro-Scissors: Precision cold division of intrauterine synechiae (Asherman’s syndrome) without thermal injury.
- Mechanical Morcellation (e.g., MyoSure): High-speed mechanical blade simultaneously cuts and evacuates endometrial polyps or fibroids.
- Bipolar Vaporization: Localized radiofrequency probes seal vascular pedicles and ablate irregular tissue beds.
6. Fluid Evacuation and Scope Withdrawal
After verifying complete hemostasis, the inflow valve is closed, the distension fluid is evacuated, and the hysteroscope is gently withdrawn.
Clinical Advantages of Incision-Free Endoscopy
Compared to historical dilation and curettage (D&C) or open abdominal surgeries, hysteroscopy offers unmatched clinical advantages:
- Targeted vs. Blind Sampling: Blind D&C misses up to 35% of focal polyps and fibroids, whereas hysteroscopy provides 100% direct visual targeting.
- Zero Cutaneous Scarring: Zero skin incisions means no cosmetic scarring, no risk of wound dehiscence, and minimal post-operative pain.
- Rapid Return to Routine Life: Most patients return to full daily schedules within 24 to 48 hours.
Frequently Asked Questions
Is cervical dilation always required for a hysteroscopy?
No. With modern miniature diagnostic hysteroscopes (under 3.5mm in diameter), the scope passes naturally through the cervix with fluid pressure alone, eliminating the need for mechanical dilation in over 80% of diagnostic cases.
How long does the entire appointment last?
While the active camera time inside the uterus is only 5 to 15 minutes, the total clinic visit lasts 45 to 90 minutes including pre-procedure checks and post-exam rest.
What type of fluid is used during the procedure?
Sterile 0.9% normal saline is the universal distension fluid used in modern hysteroscopy, providing crystal-clear visualization while maintaining perfect electrolyte compatibility.
Explore our overview on Day-by-Day Recovery Expectations and check our guide on Hysteroscopy Insurance and Billing Codes.
Optical Physics and Illumination Engineering
Modern hysteroscopy relies on sophisticated optical engineering principles that ensure unmatched visual clarity inside the dark uterine cavity:
- Hopkins Rod-Lens System: Traditional glass fiber bundles have been replaced by solid quartz rod lenses with air spaces, providing dramatically increased light transmission, higher image contrast, and wider viewing angles (up to 105 degrees).
- Angled Direction of View (12° to 30°): An angled objective lens allows the surgeon to inspect the lateral uterine walls and tubal ostia simply by rotating the telescope along its longitudinal axis without tilting the outer sheath against sensitive cervical tissue.
- Cold LED Illumination: High-powered LED light generators transmit cool, daylight-balanced illumination (5500K–6500K) through flexible fiberoptic cables, preventing any thermal damage to delicate endometrial cells.
Intraoperative Quality Assurance and Documentation
Standardized surgical protocols require high-definition photographic and video recording of all four uterine quadrants, preserving objective digital records for patient medical charts and pathology correlations.
Get our latest guides, news, and insights highlighted in your Google Search & AI Overviews.